COMPANION RESOURCES
Diagrams & Figures
The 14 figures from the book. Open an original image for a closer look or save it for your own reference. The accompanying explanations are in the free book.
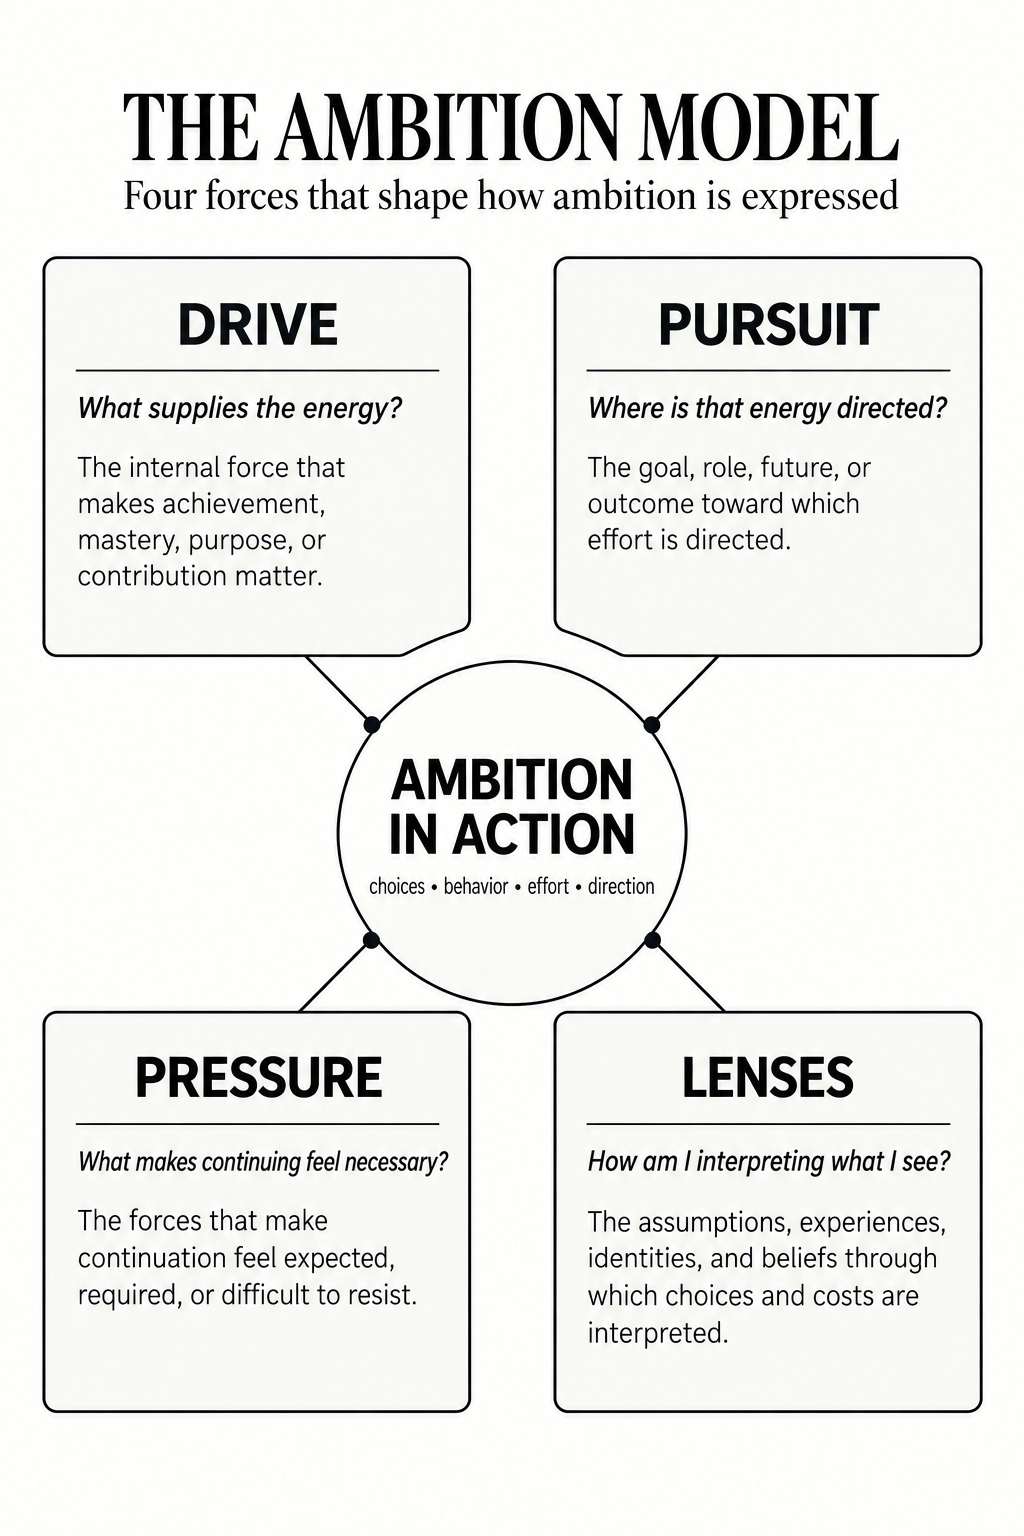
FIGURE 01
Ambition
Open / save full-size image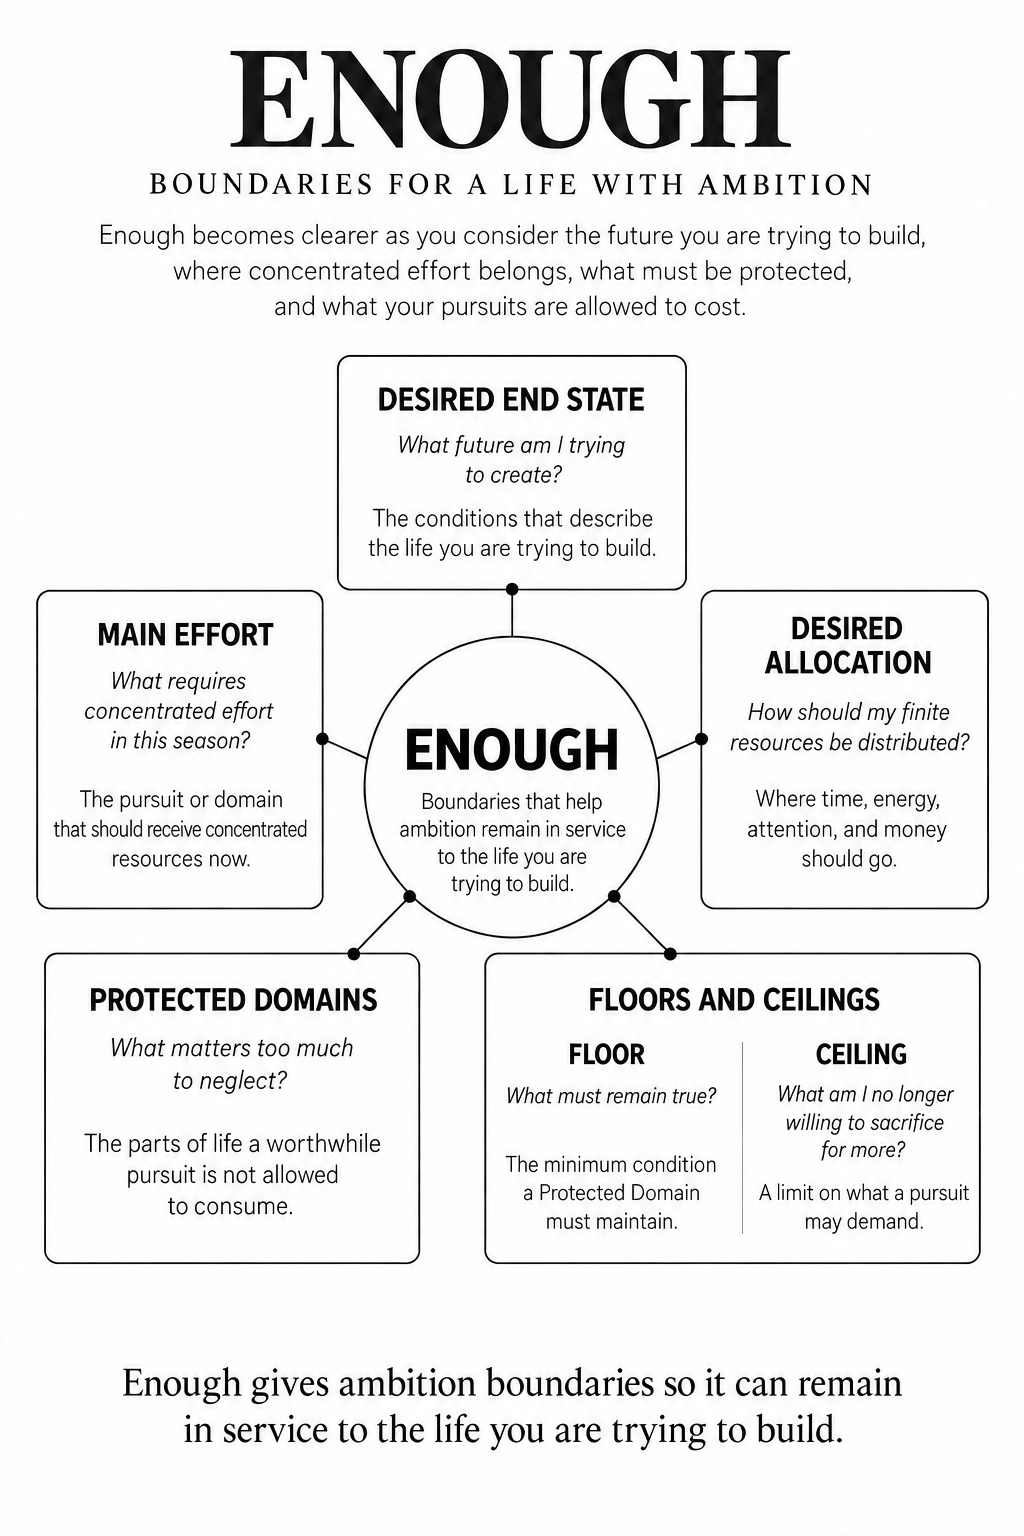
FIGURE 02
Enough Framework
Open / save full-size image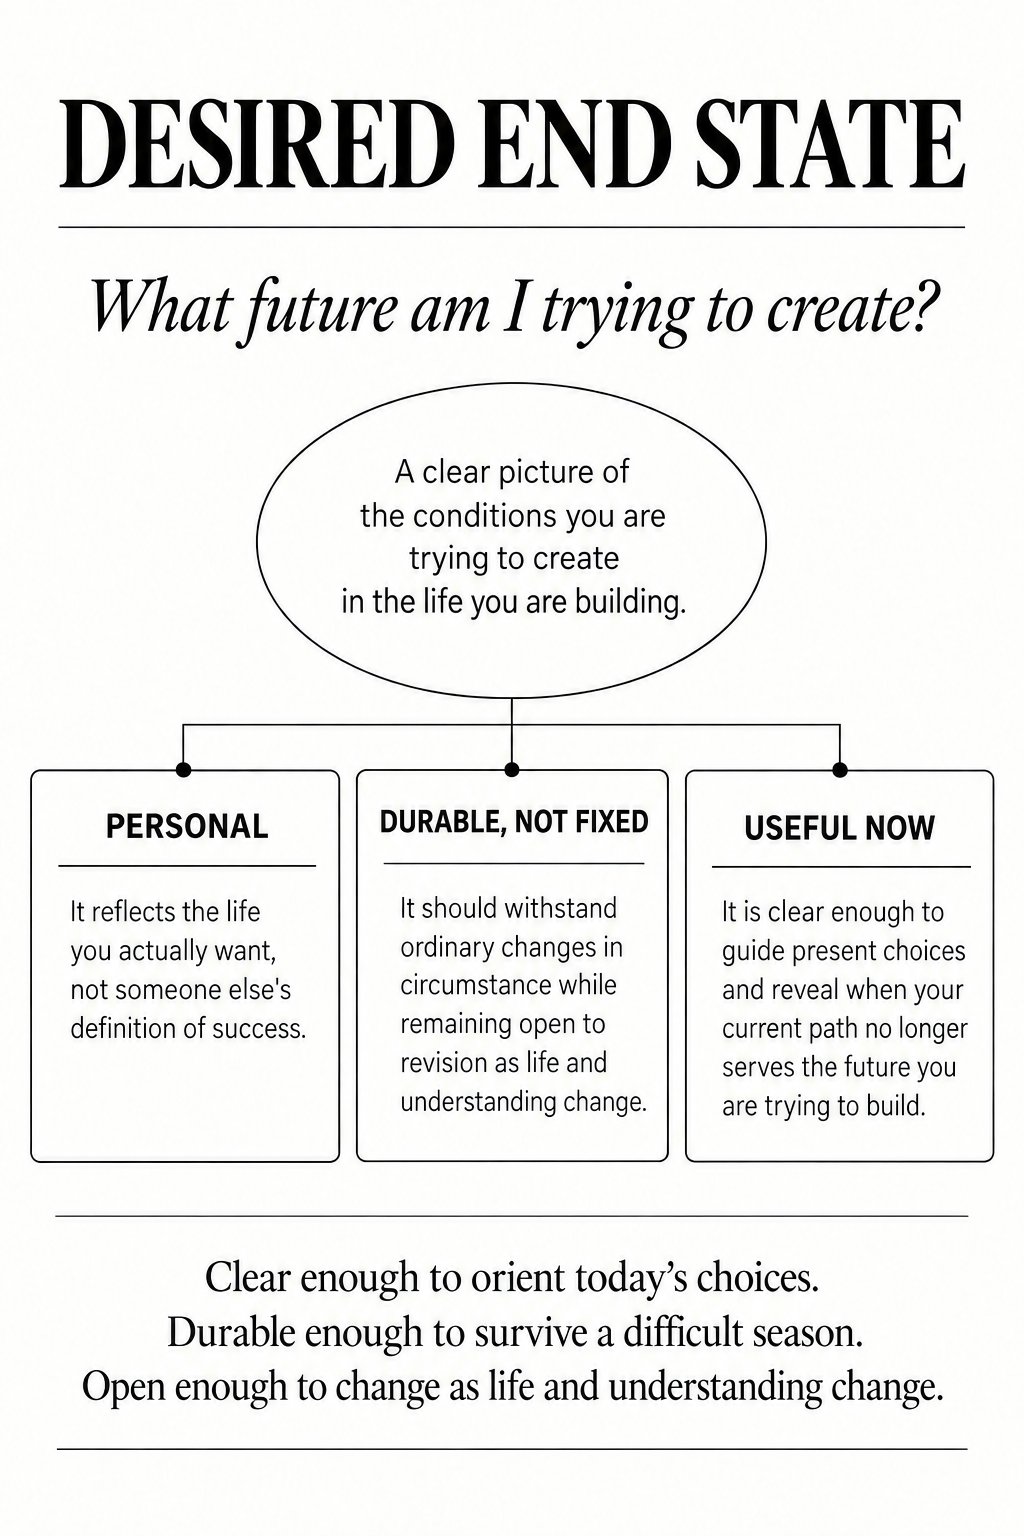
FIGURE 03
Desired End State
Open / save full-size image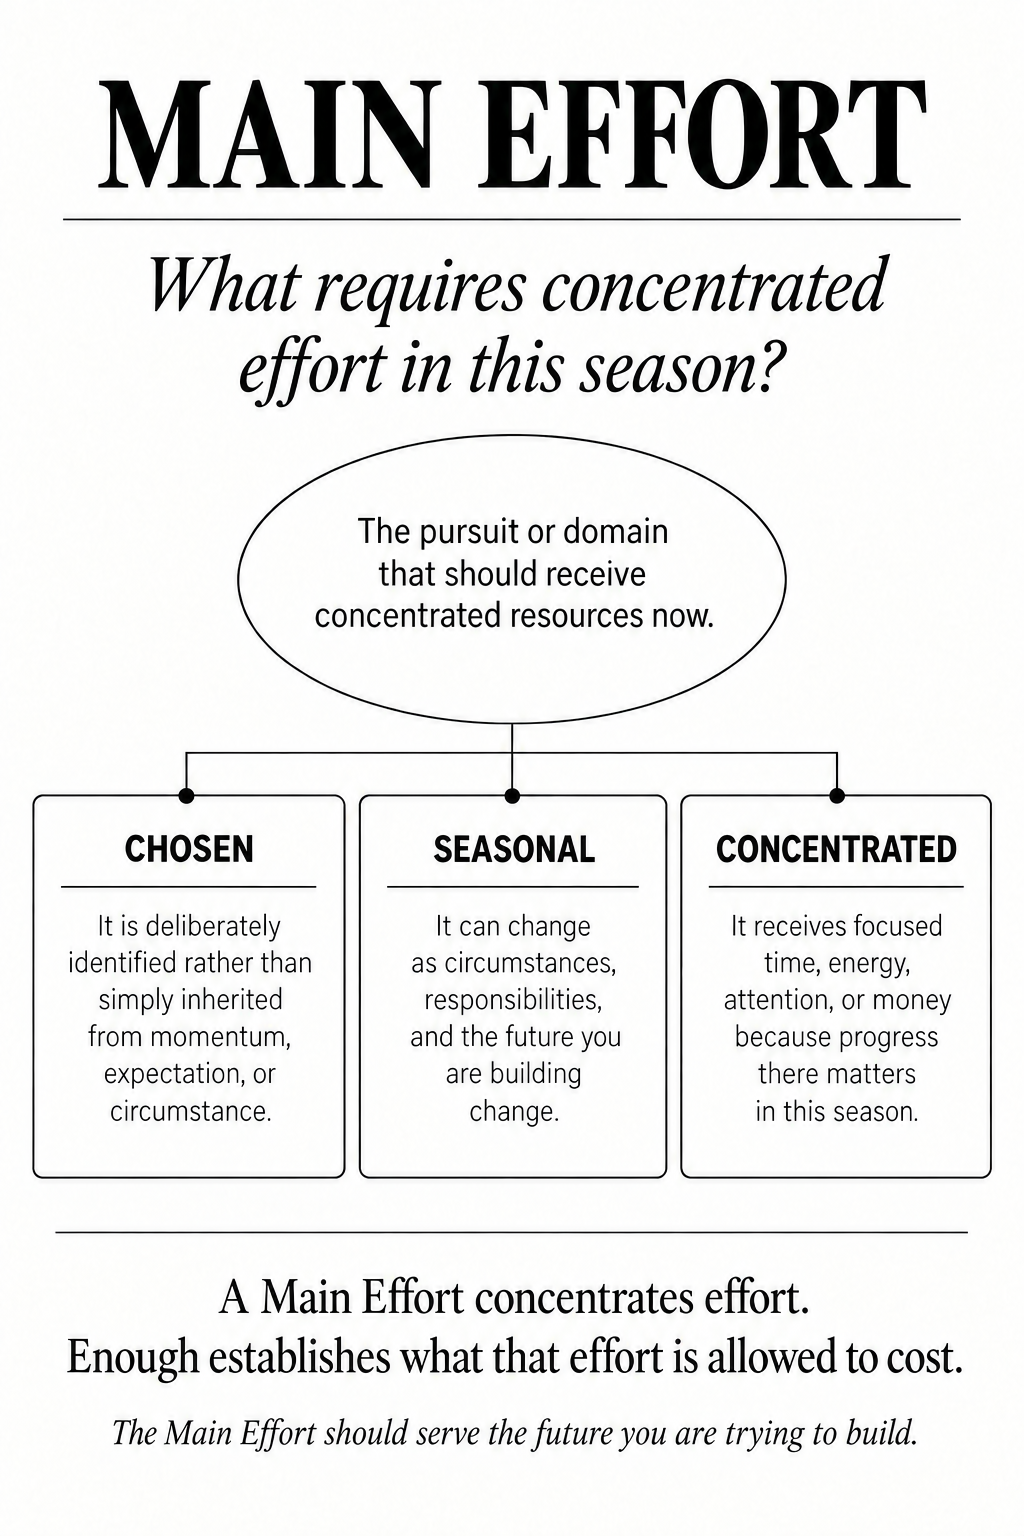
FIGURE 04
Main Effort
Open / save full-size image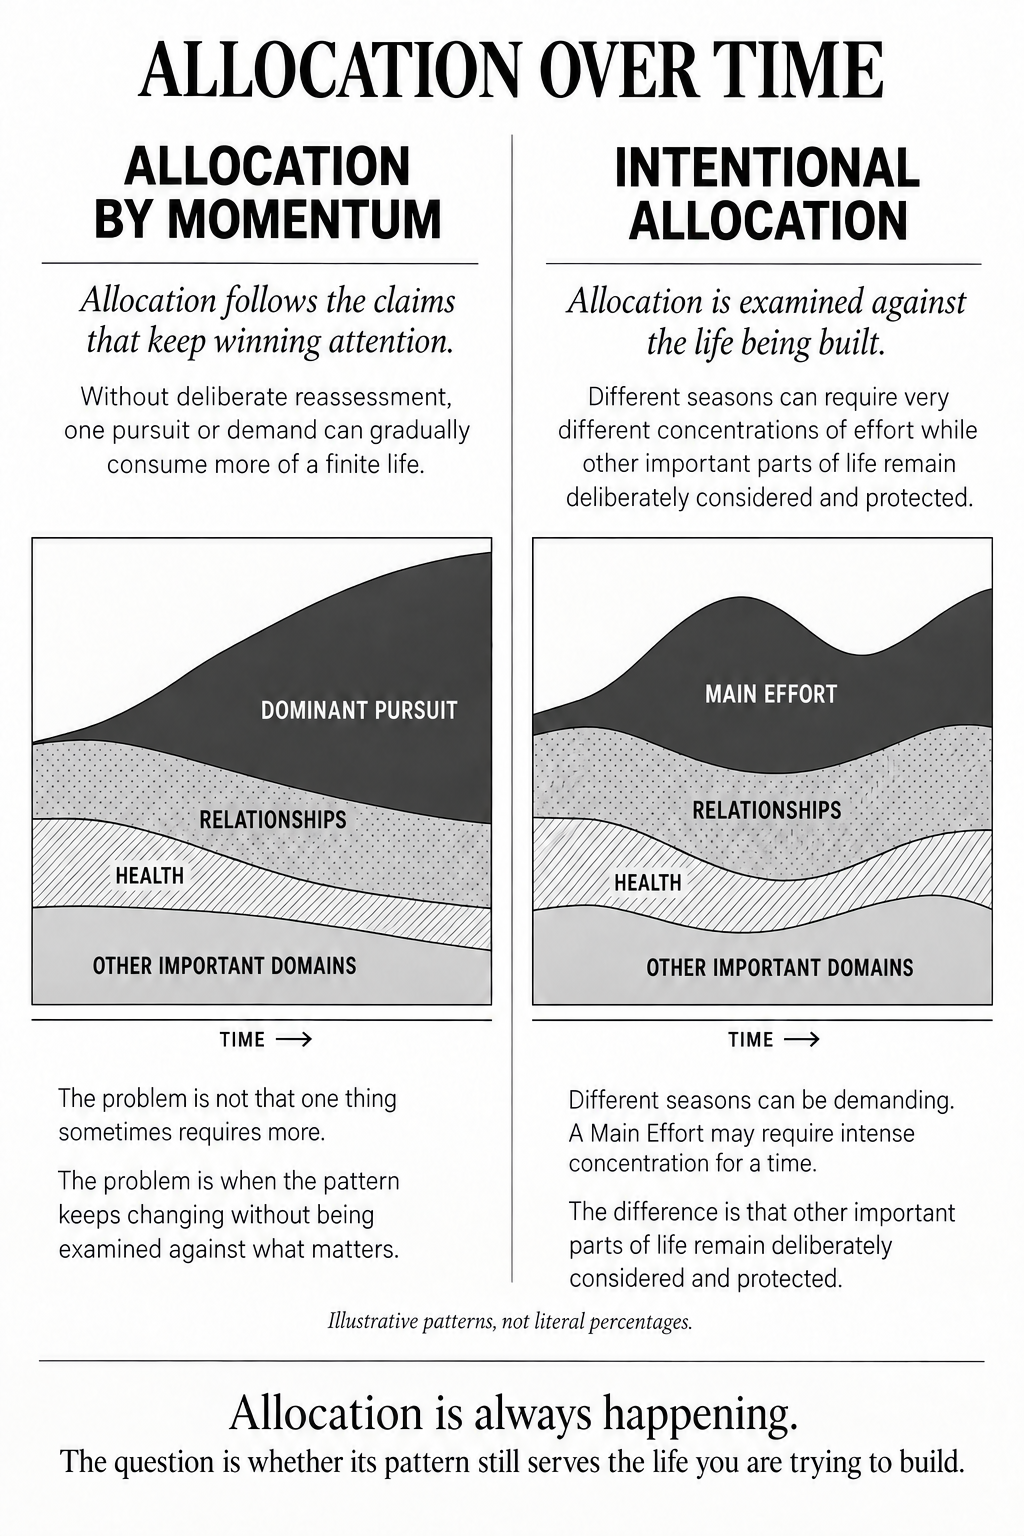
FIGURE 05
Allocation over time
Open / save full-size image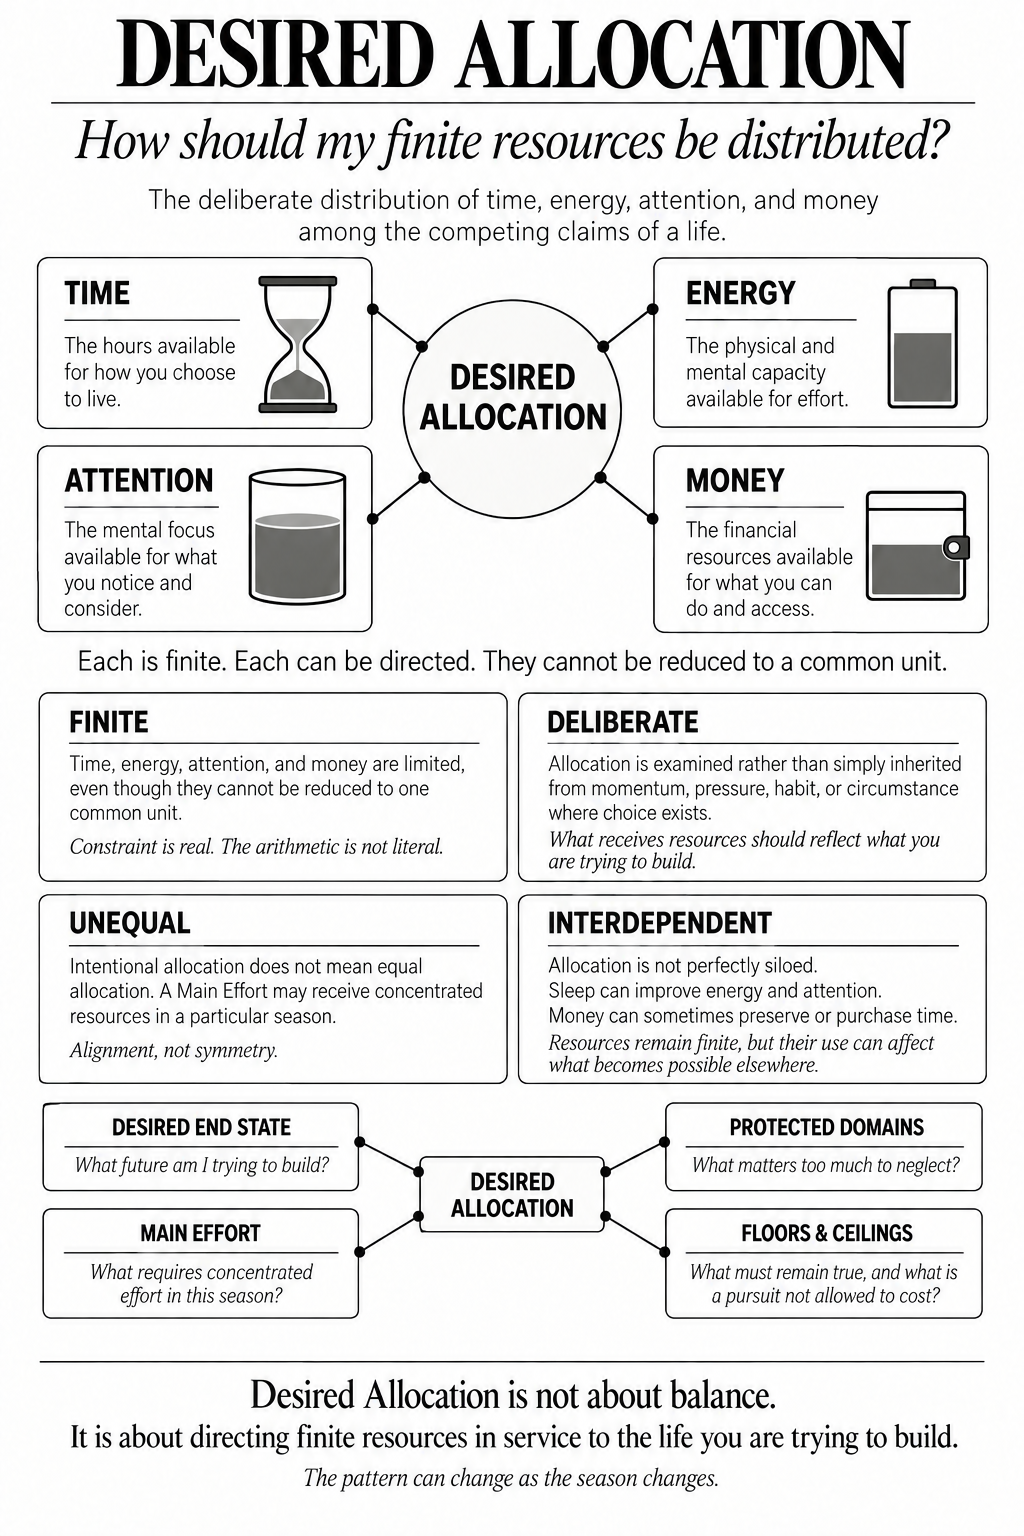
FIGURE 06
Desired Allocation
Open / save full-size image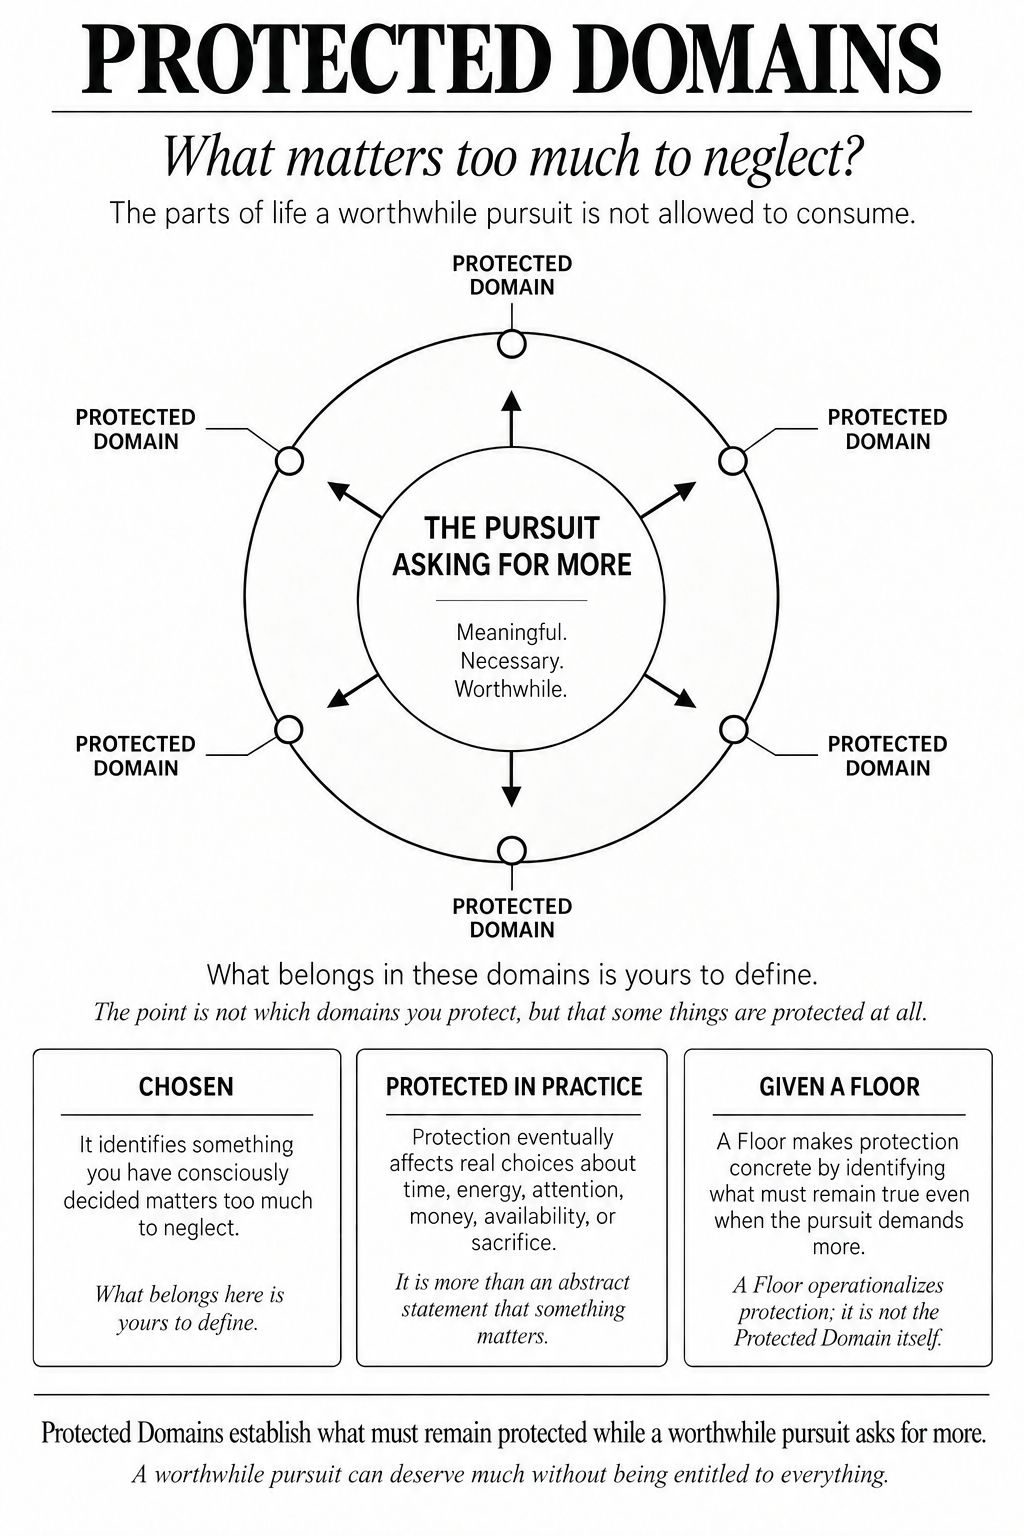
FIGURE 07
Protected Domains
Open / save full-size image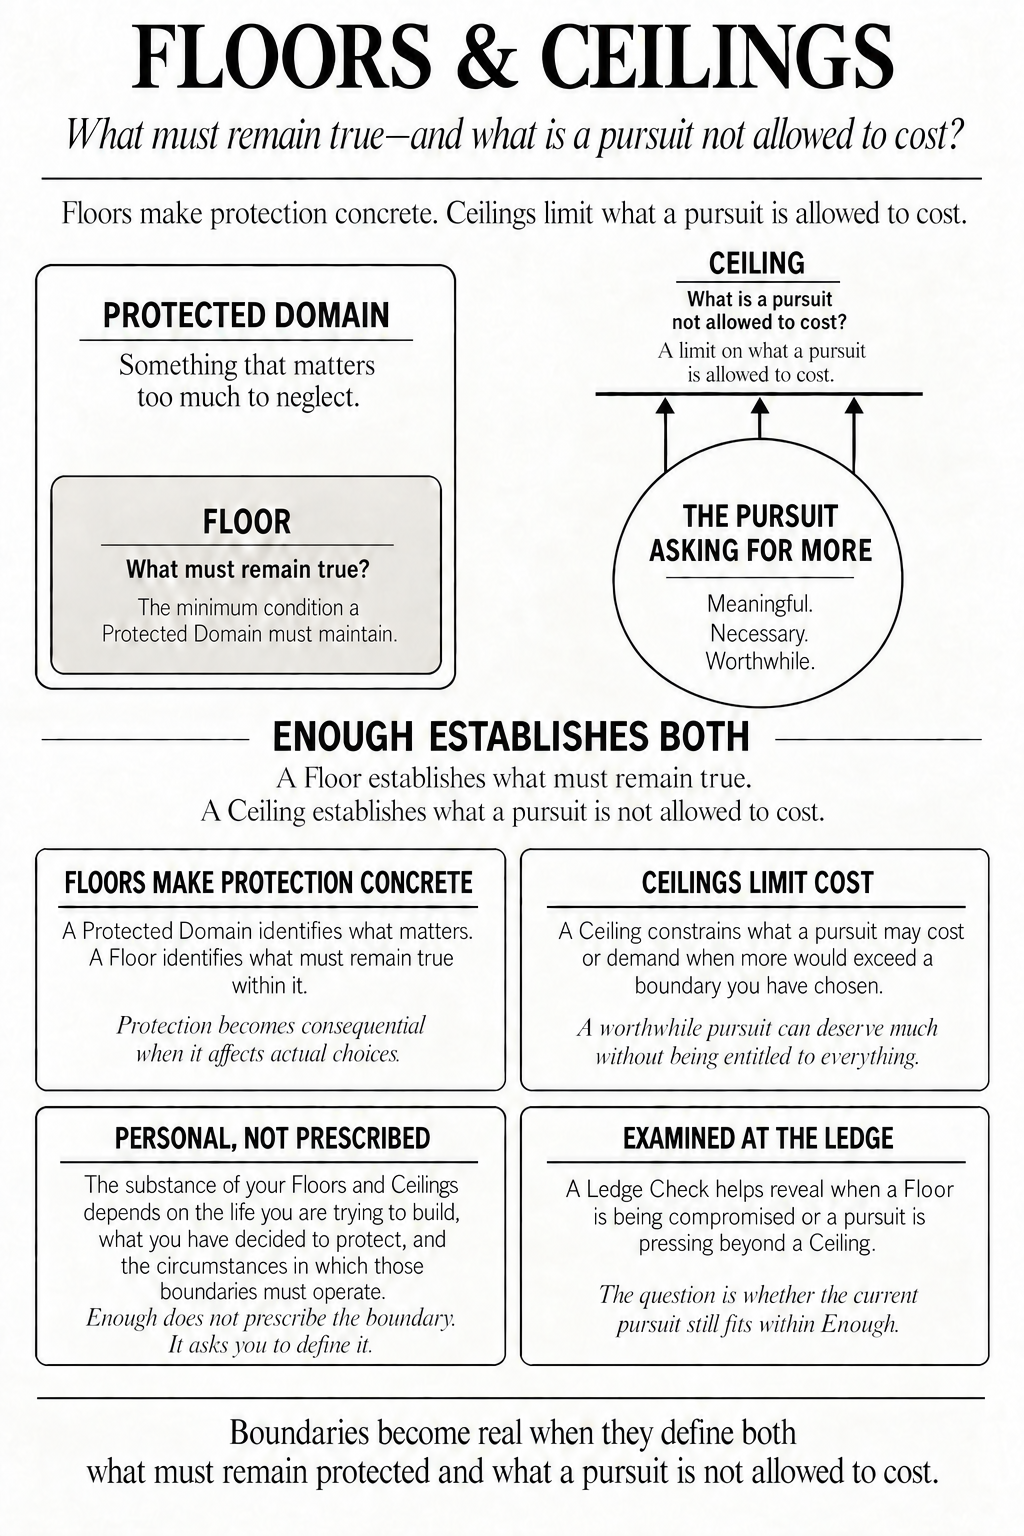
FIGURE 08
Floors and Ceilings
Open / save full-size image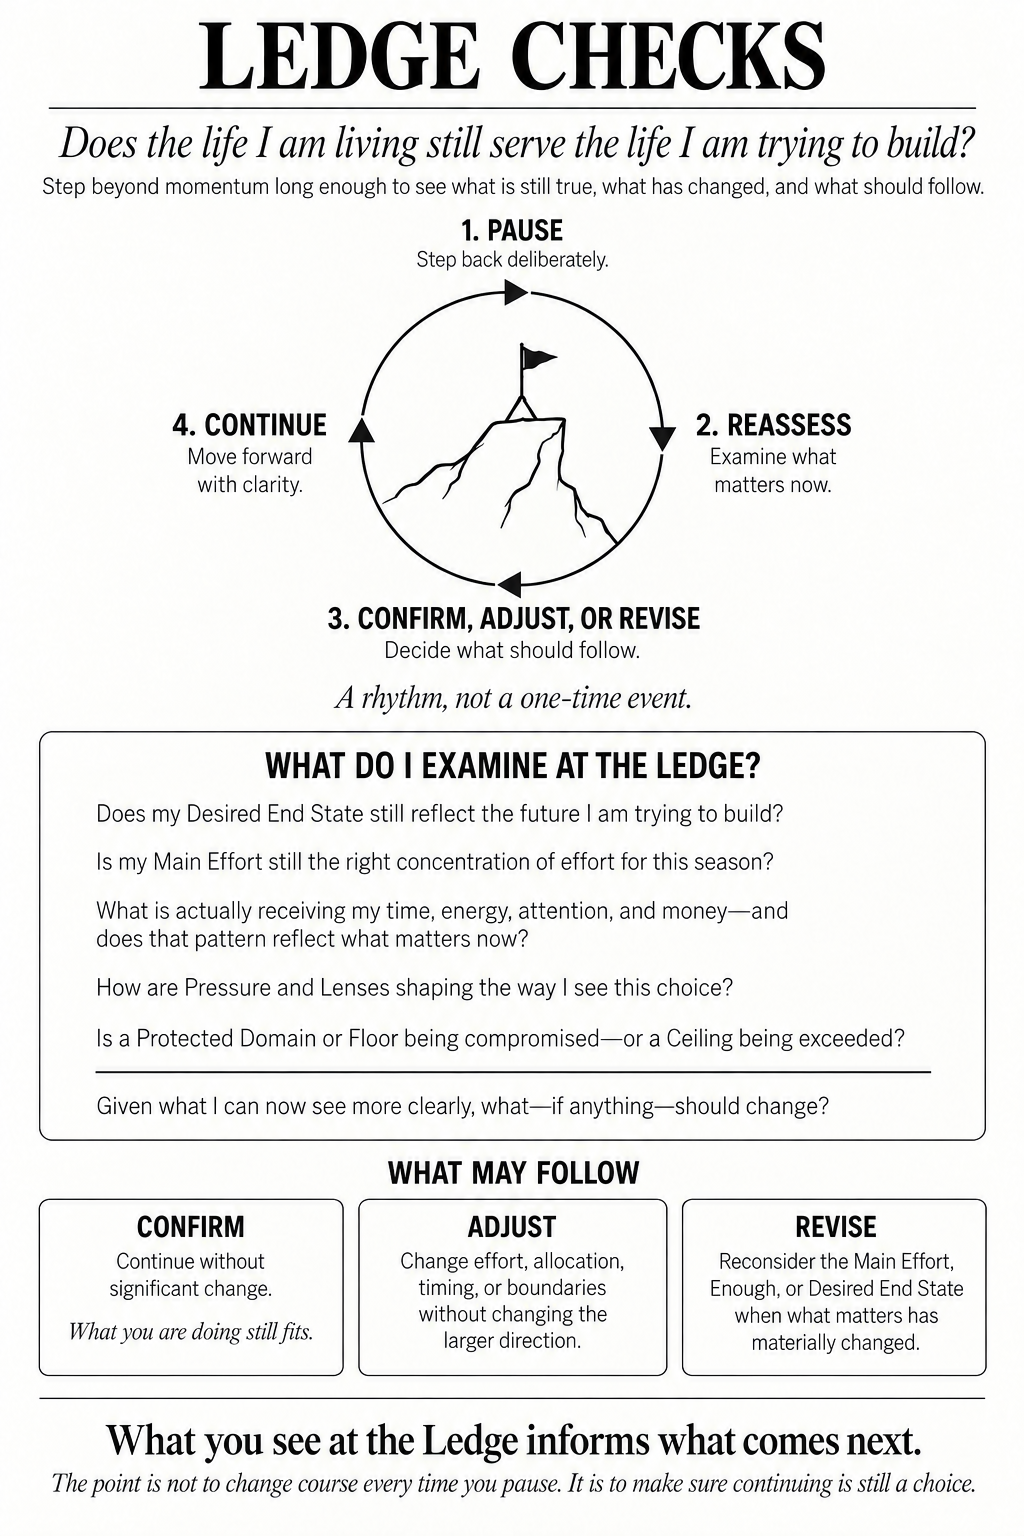
FIGURE 09
Ledge Checks
Open / save full-size image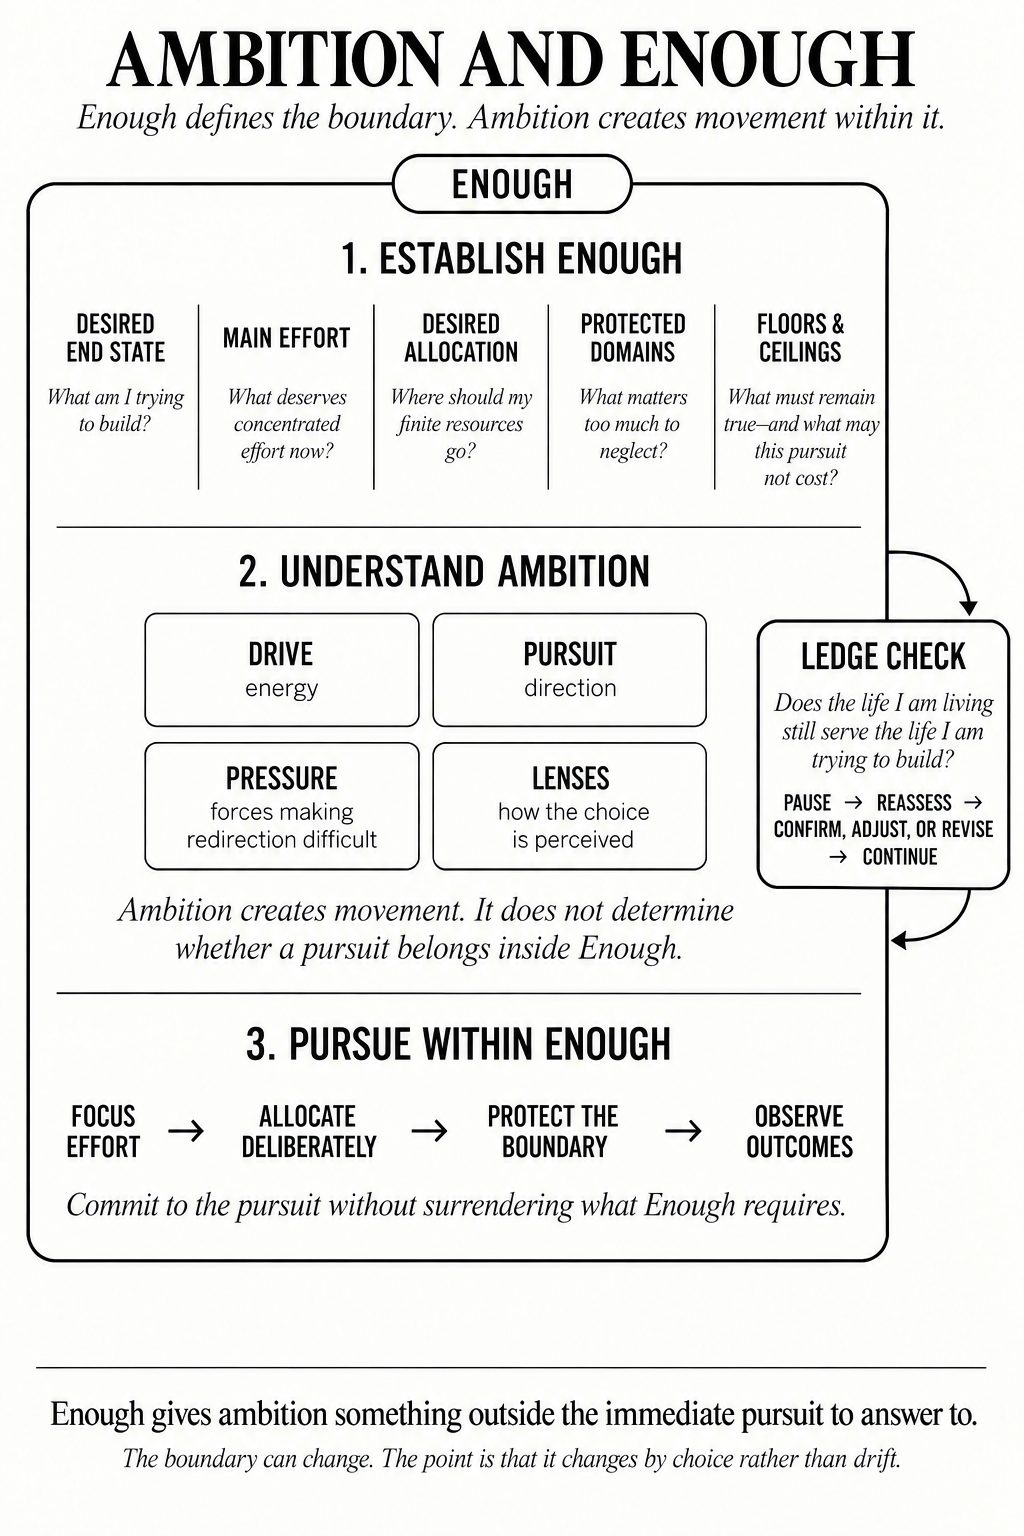
FIGURE 10
Ambition and Enough
Open / save full-size image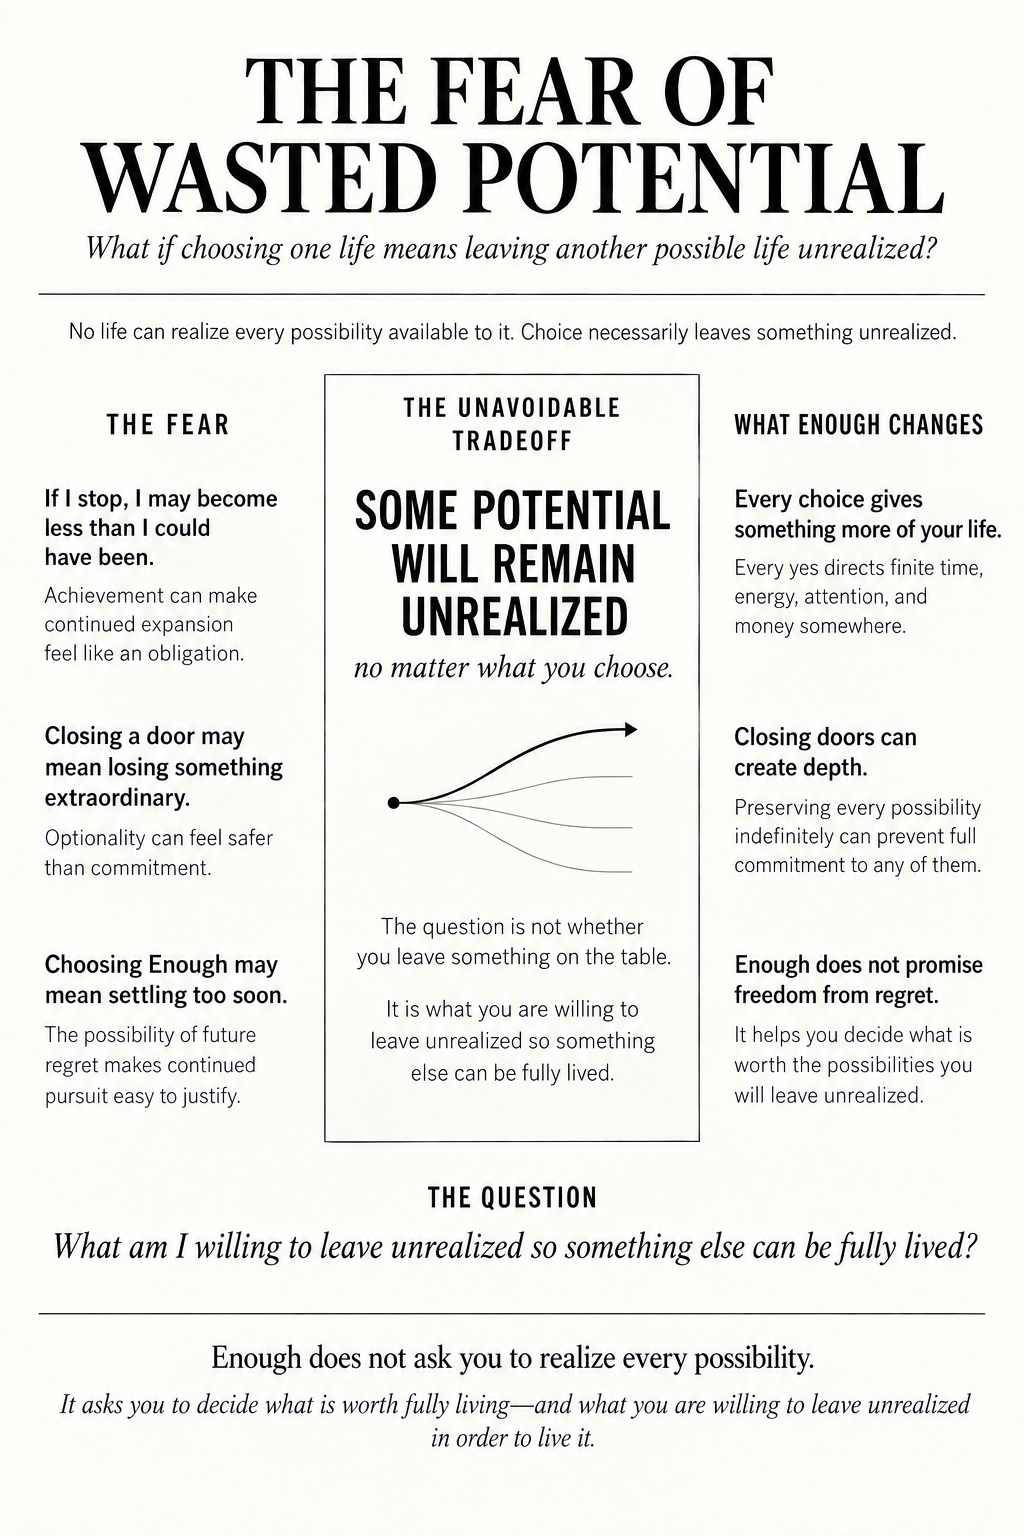
FIGURE 11
Fear of Wasted Potential
Open / save full-size image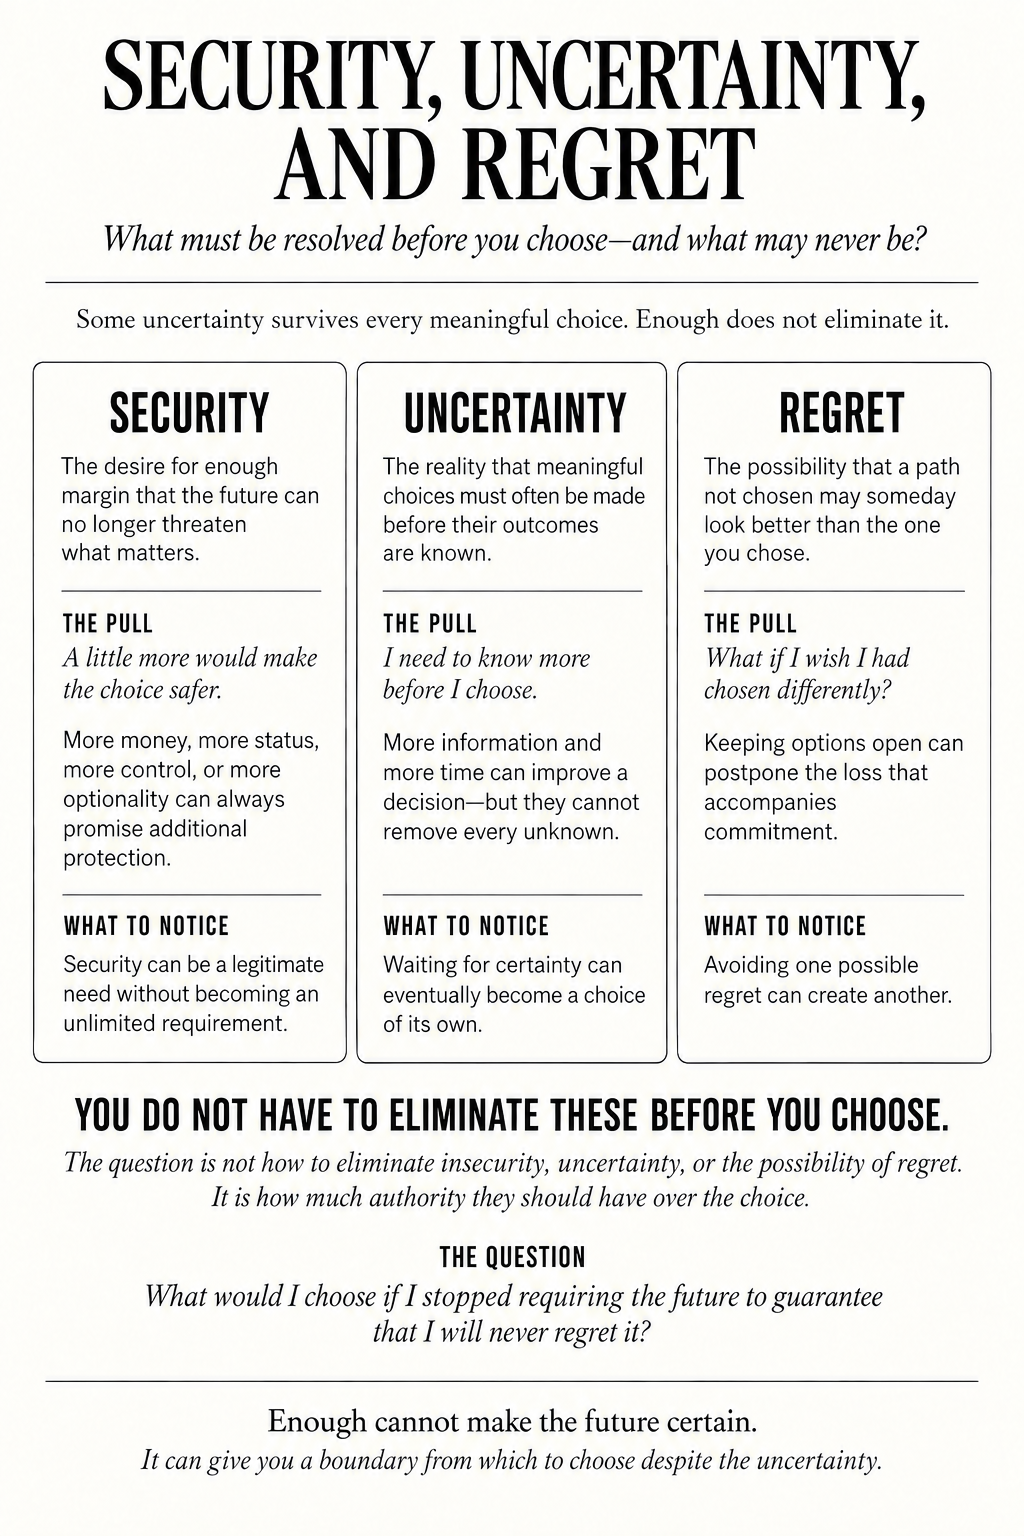
FIGURE 12
Security Uncertainty and Regret
Open / save full-size image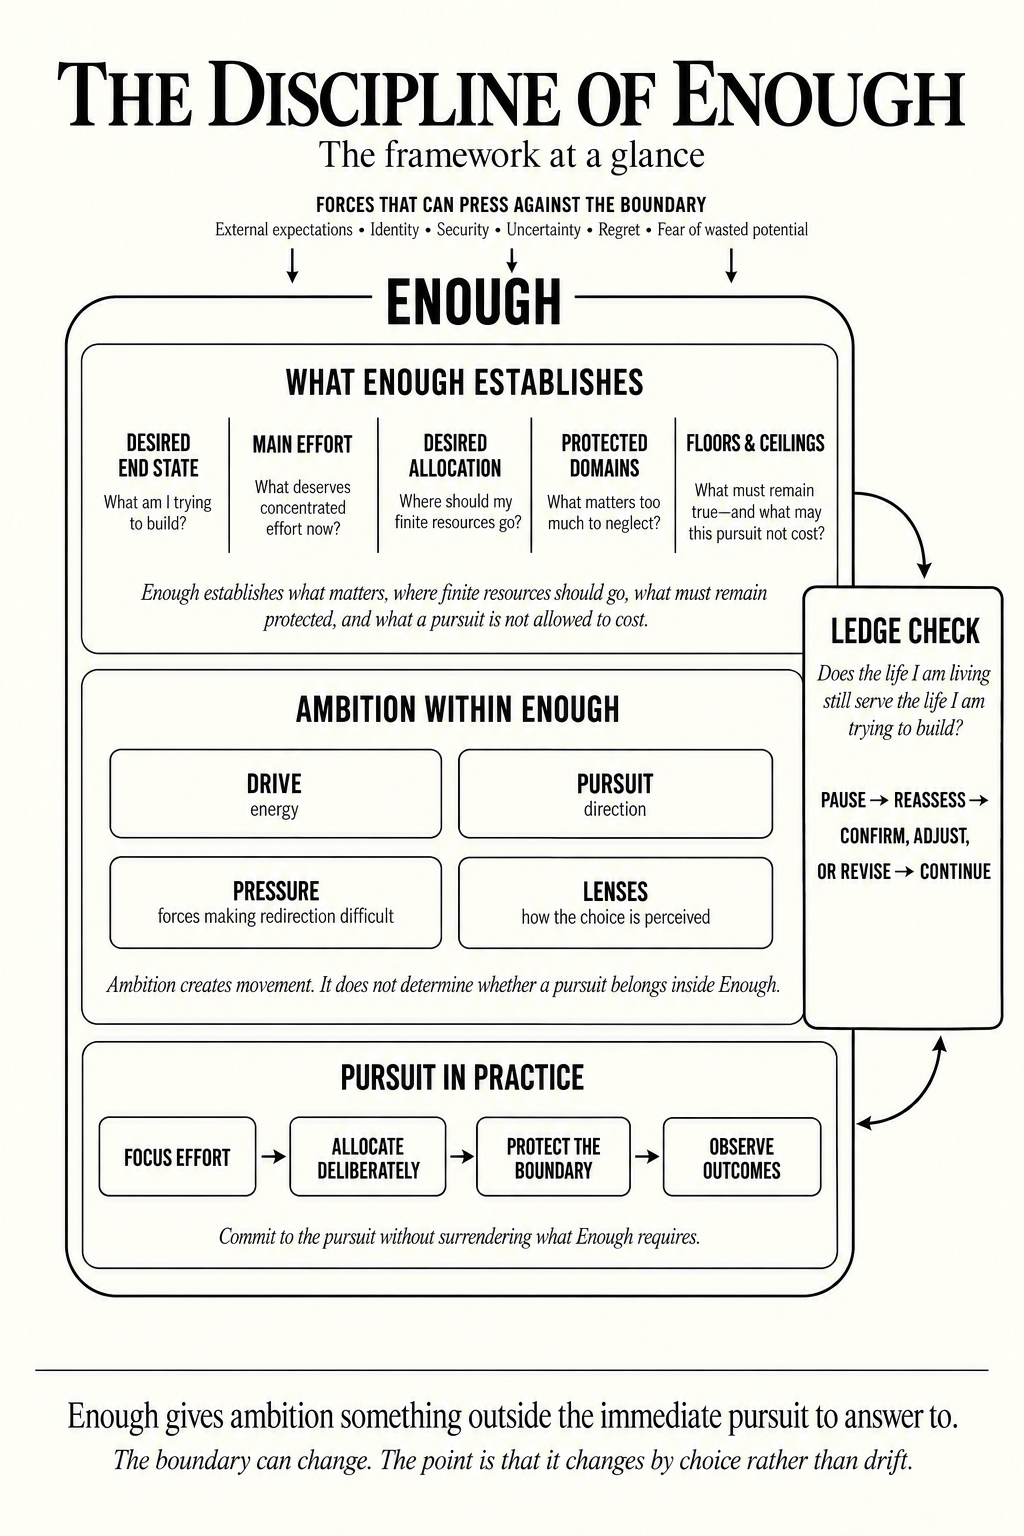
FIGURE 13
Framework at a glance
Open / save full-size image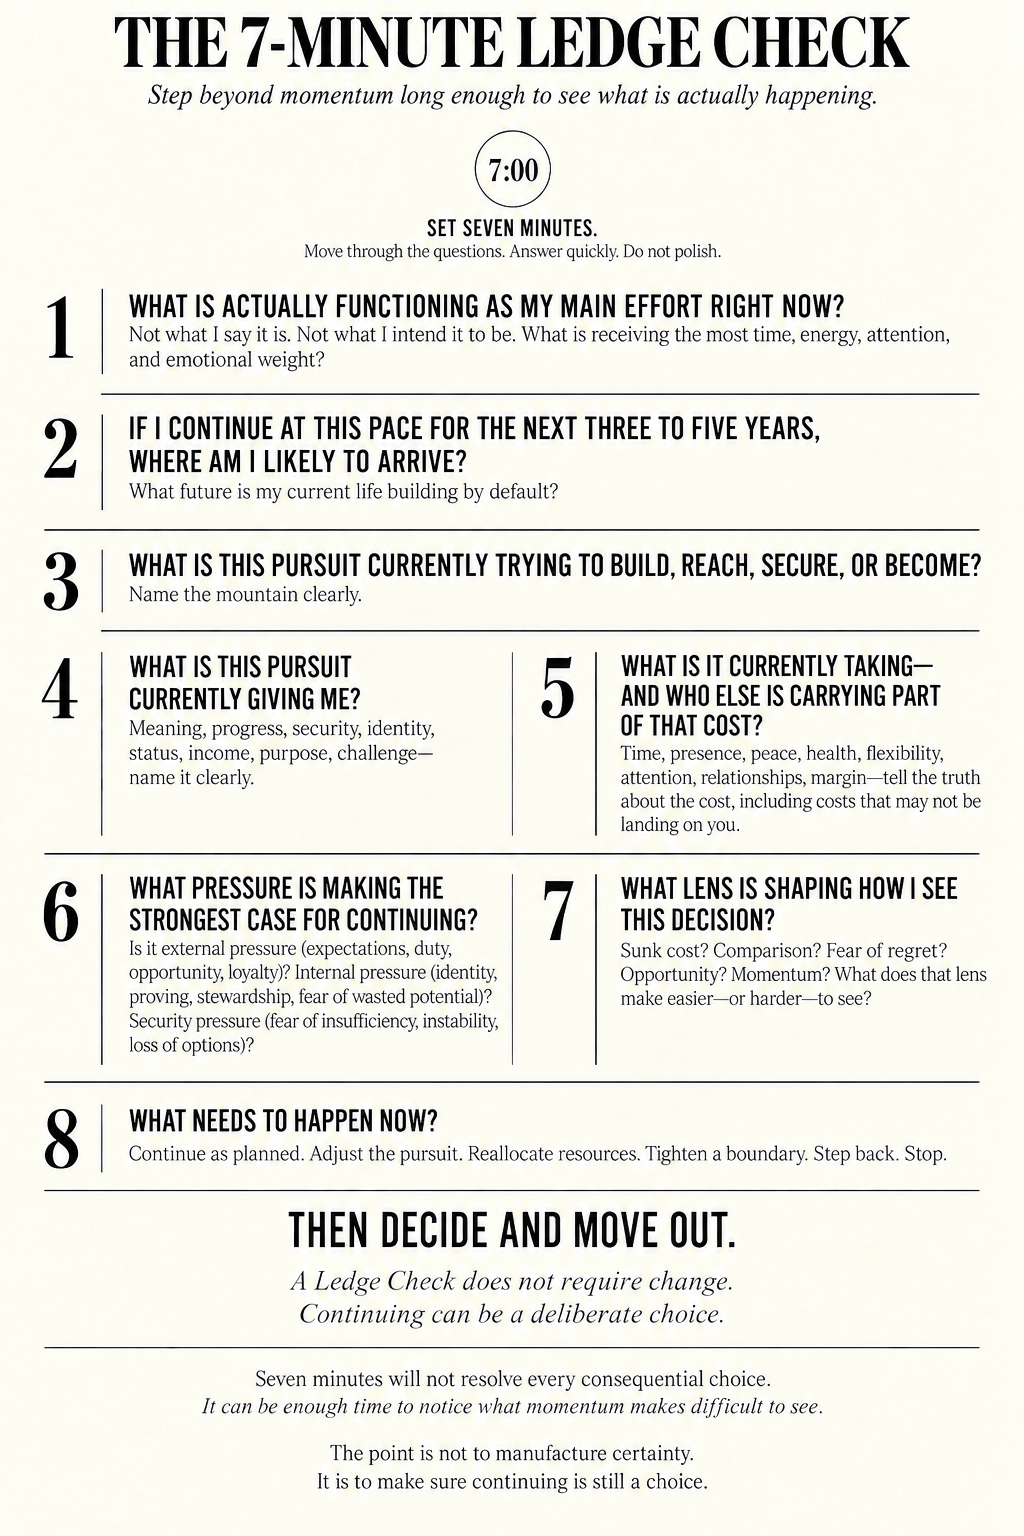
FIGURE 14